
As the winter snows of the Rocky Mountains begin to thaw, a change is set in motion. The landscape breaks loose and emerges from a crisp exoskeleton of winter. For many fly fishers the pinnacle of this yearly change is the transformation of Pteronarcys californica – the stonefly known as the salmonfly – into its adult form. Most fly fishers have some familiarity with spring salmonfly hatches that proclaim the beginning of the new season on many of western North America’s freestone rivers and streams. While the salmonfly hatch is one of fly fishing’s most compelling events, success during this time is not guaranteed and often depends on the design of your flies.
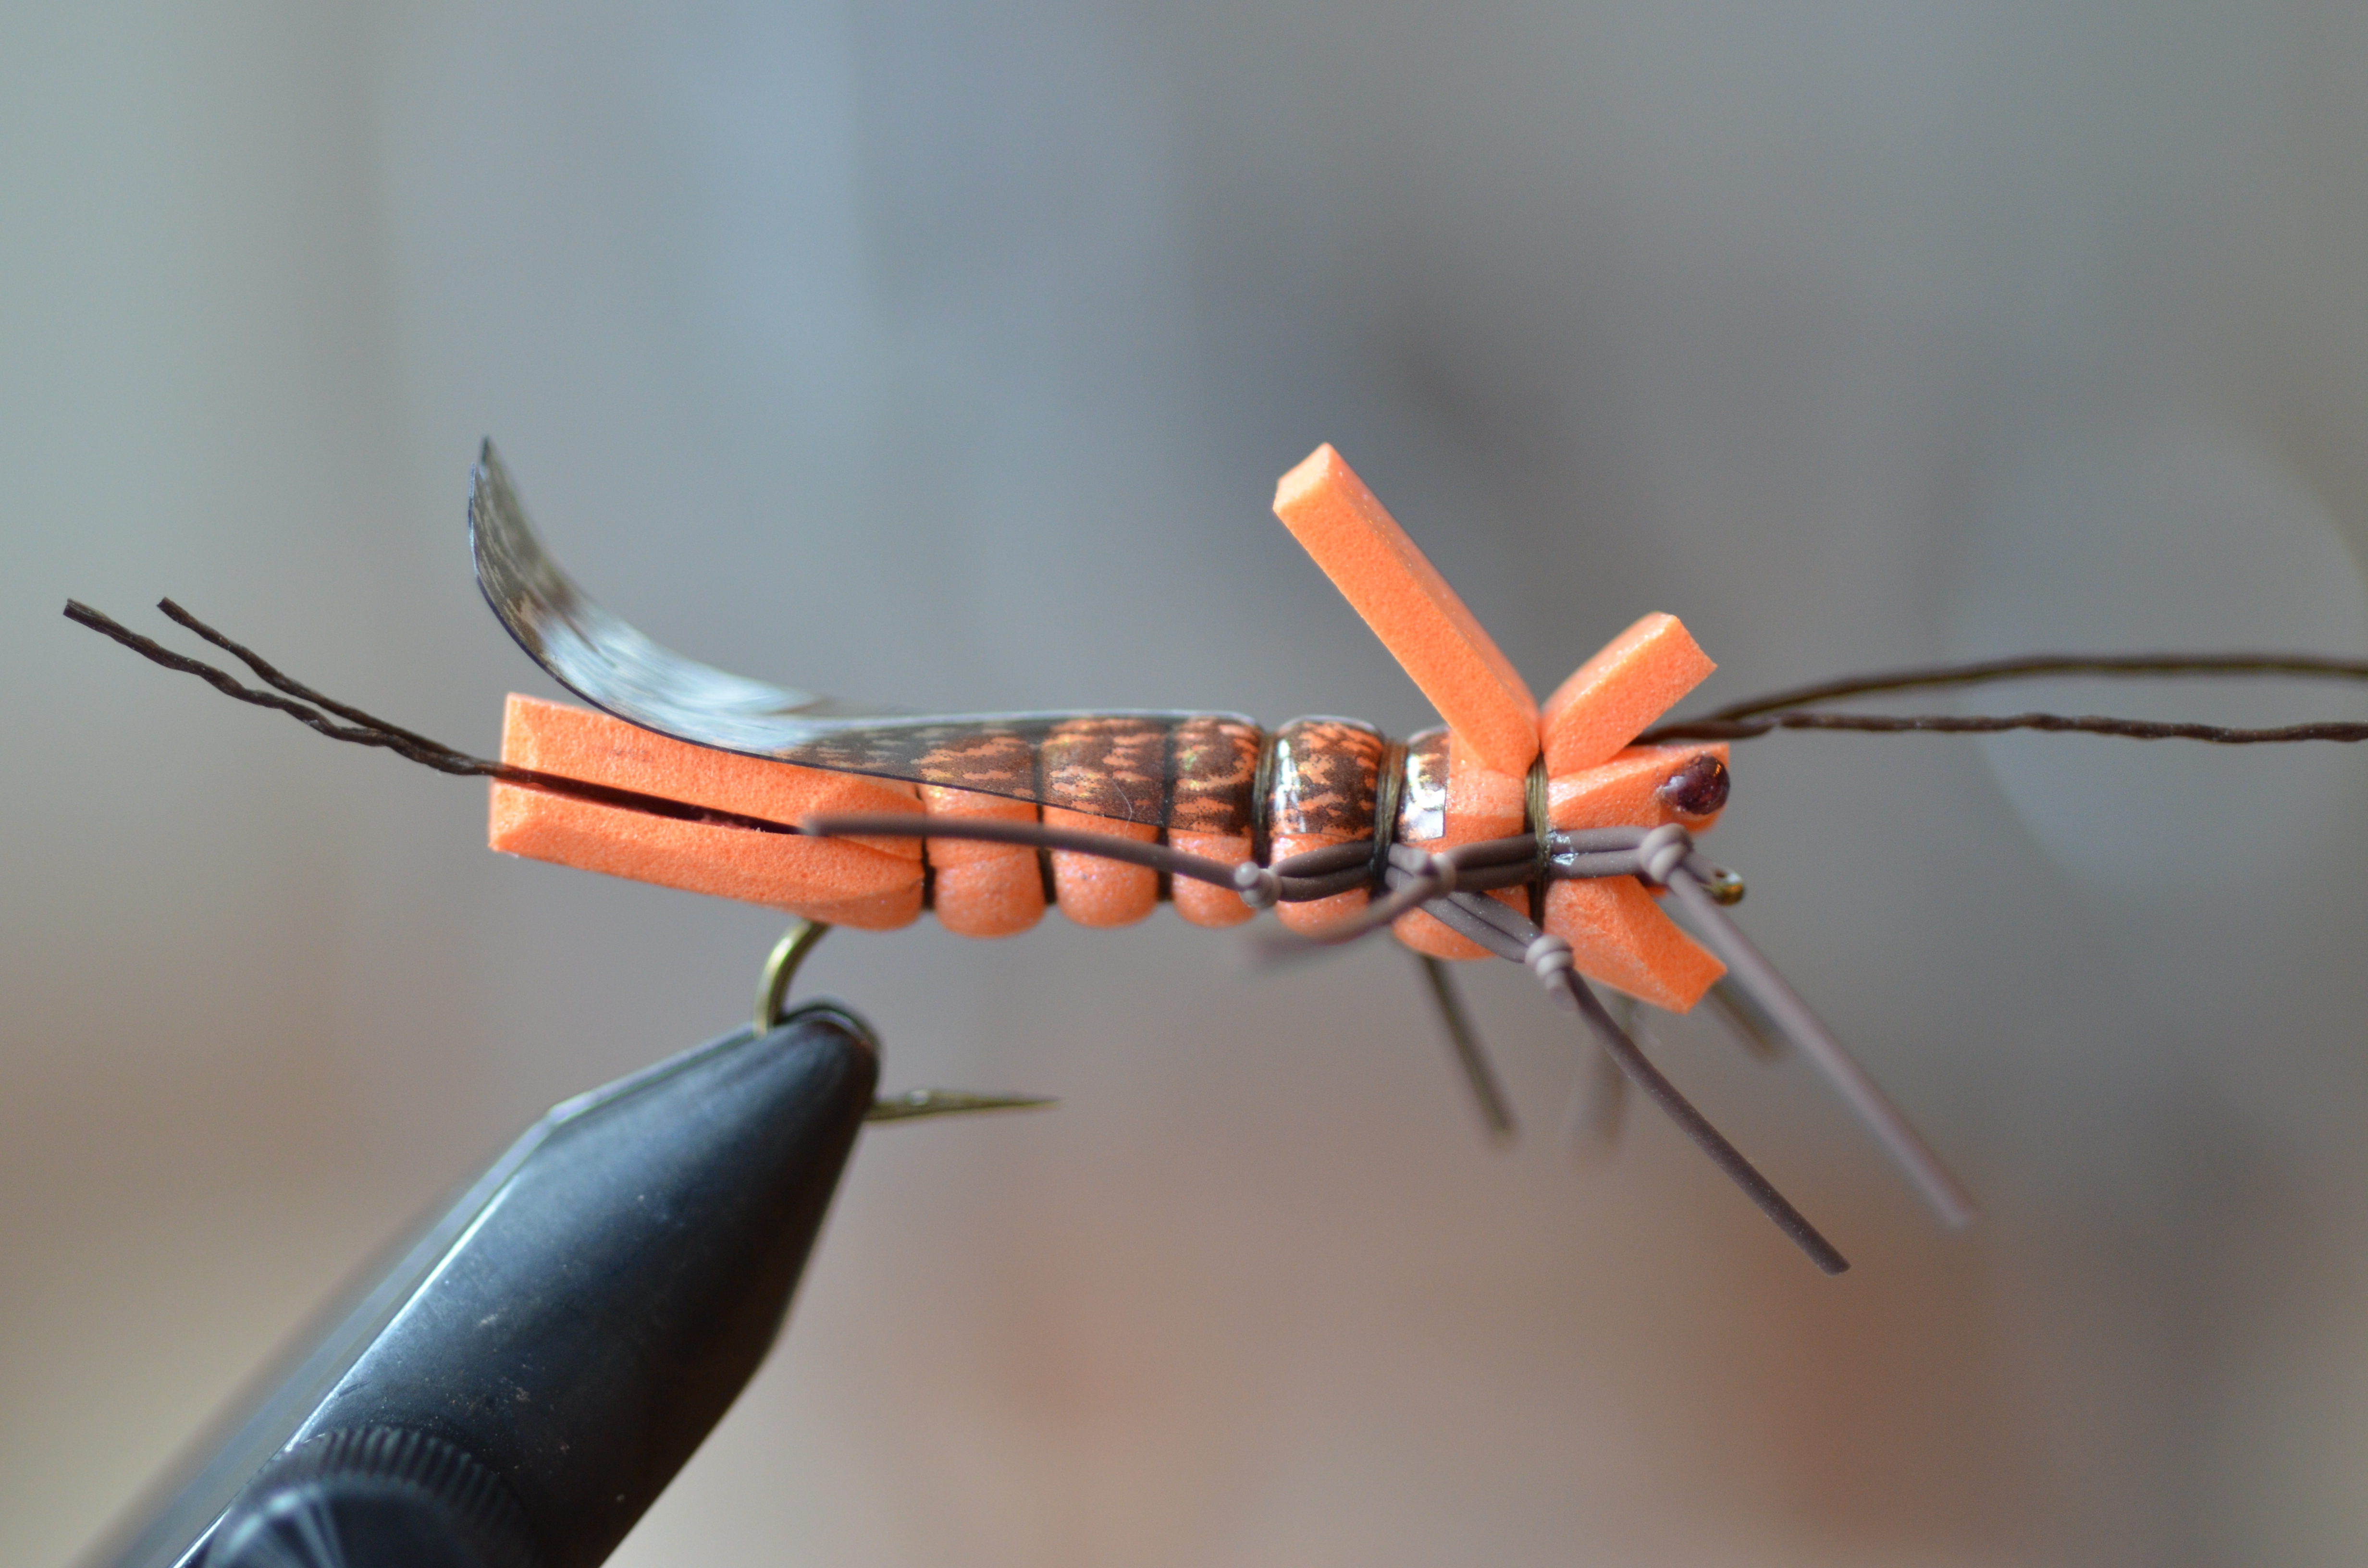
When creating the Beefcake Stone, I spent extensive time observing the naturals from both above and below the water. This provided me with an accurate picture of the insect’s visual and behavioural traits. The exoskeletons of adult salmon flies display a subtle sheen so I selected a tying material that was capable of producing the same effect in my imitations. With a combination of buoyancy and reflectivity, Wapsi’s Loco Foam is the perfect material. In addition to its gloss, its laminated coating reduces flexibility. This allows for more realistic body segmentation.
While the body of the fly itself is rigid, its appendages move easily. The Sexi-floss antennae and tail fibers, along with round rubber legs, provide the fly with actively twitching limbs. Tantalizing action is paired with realism by knotting all of the legs. This nicely mimics the prominent leg joints in adult Pteronarcys.
Aesthetic appeal is crucial but without durability it is meaningless. Zap-A-Gap is essential when working with the foam elements of this pattern. It should be applied any time two foam surfaces are placed in contact. At the core of the pattern is the sturdy Tiemco 200R hook. This hook is strong enough to turn even the heaviest fish in high spring flows without straightening out. The elk and deer hair wings used in many adult salmon fly patterns have been replaced by Thin Skin. This is often used in the construction of nymphs and streamers, yet with its sheen, flexibility and extreme durability, it is an ideal wing material. The bottom of this pattern is viewed by fish and thus should be given special attention. To ensure the longevity of the Loco Foam in this area, I coat the bottom surface of the fly with a thin layer of UV Clear Cure Goo. This greatly increases the visual and functional durability of the underside.
When fishing the Beefcake Stone, tippet size is dependent on water clarity. On freestone rivers the water is often high and murky during the salmonfly hatch. In these situations I use 2X fluorocarbon tippet. As water clarity improves I move to 3X or 4X. Fish in crystal-clear water will happily take a salmon-fly pattern properly presented on 4X fluorocarbon tippet.
On its own, the Beefcake Stone is more than capable of producing plenty of fish. I sometimes double down and fish a dual dry setup with two Beefcakes. I attach the second fly with two feet of fluorocarbon tippet from the eye of the front fly to the eye of the rear fly. I use a non-slip mono loop knot for all connections. These knots allow the flies to move freely and are stronger than clinch knots. I also fish a large but lightly weighted stonefly nymph on a dropper two feet beneath a single Beefcake Stone. With this rig, I target the shallow pockets and margins of the river. This technique can be deadly during the early stages of the hatch because of the large number of nymphs that congregate in these areas prior to their exodus from the water.
Triumph in fly fishing is often signified by a successful meeting of fly and fish. The expectation of this is never greater than when you’re standing in the midst of a salmonfly hatch. Don’t leave triumph to chance. Try a Beefcake Stone and find success in the midst of chaotic beauty.
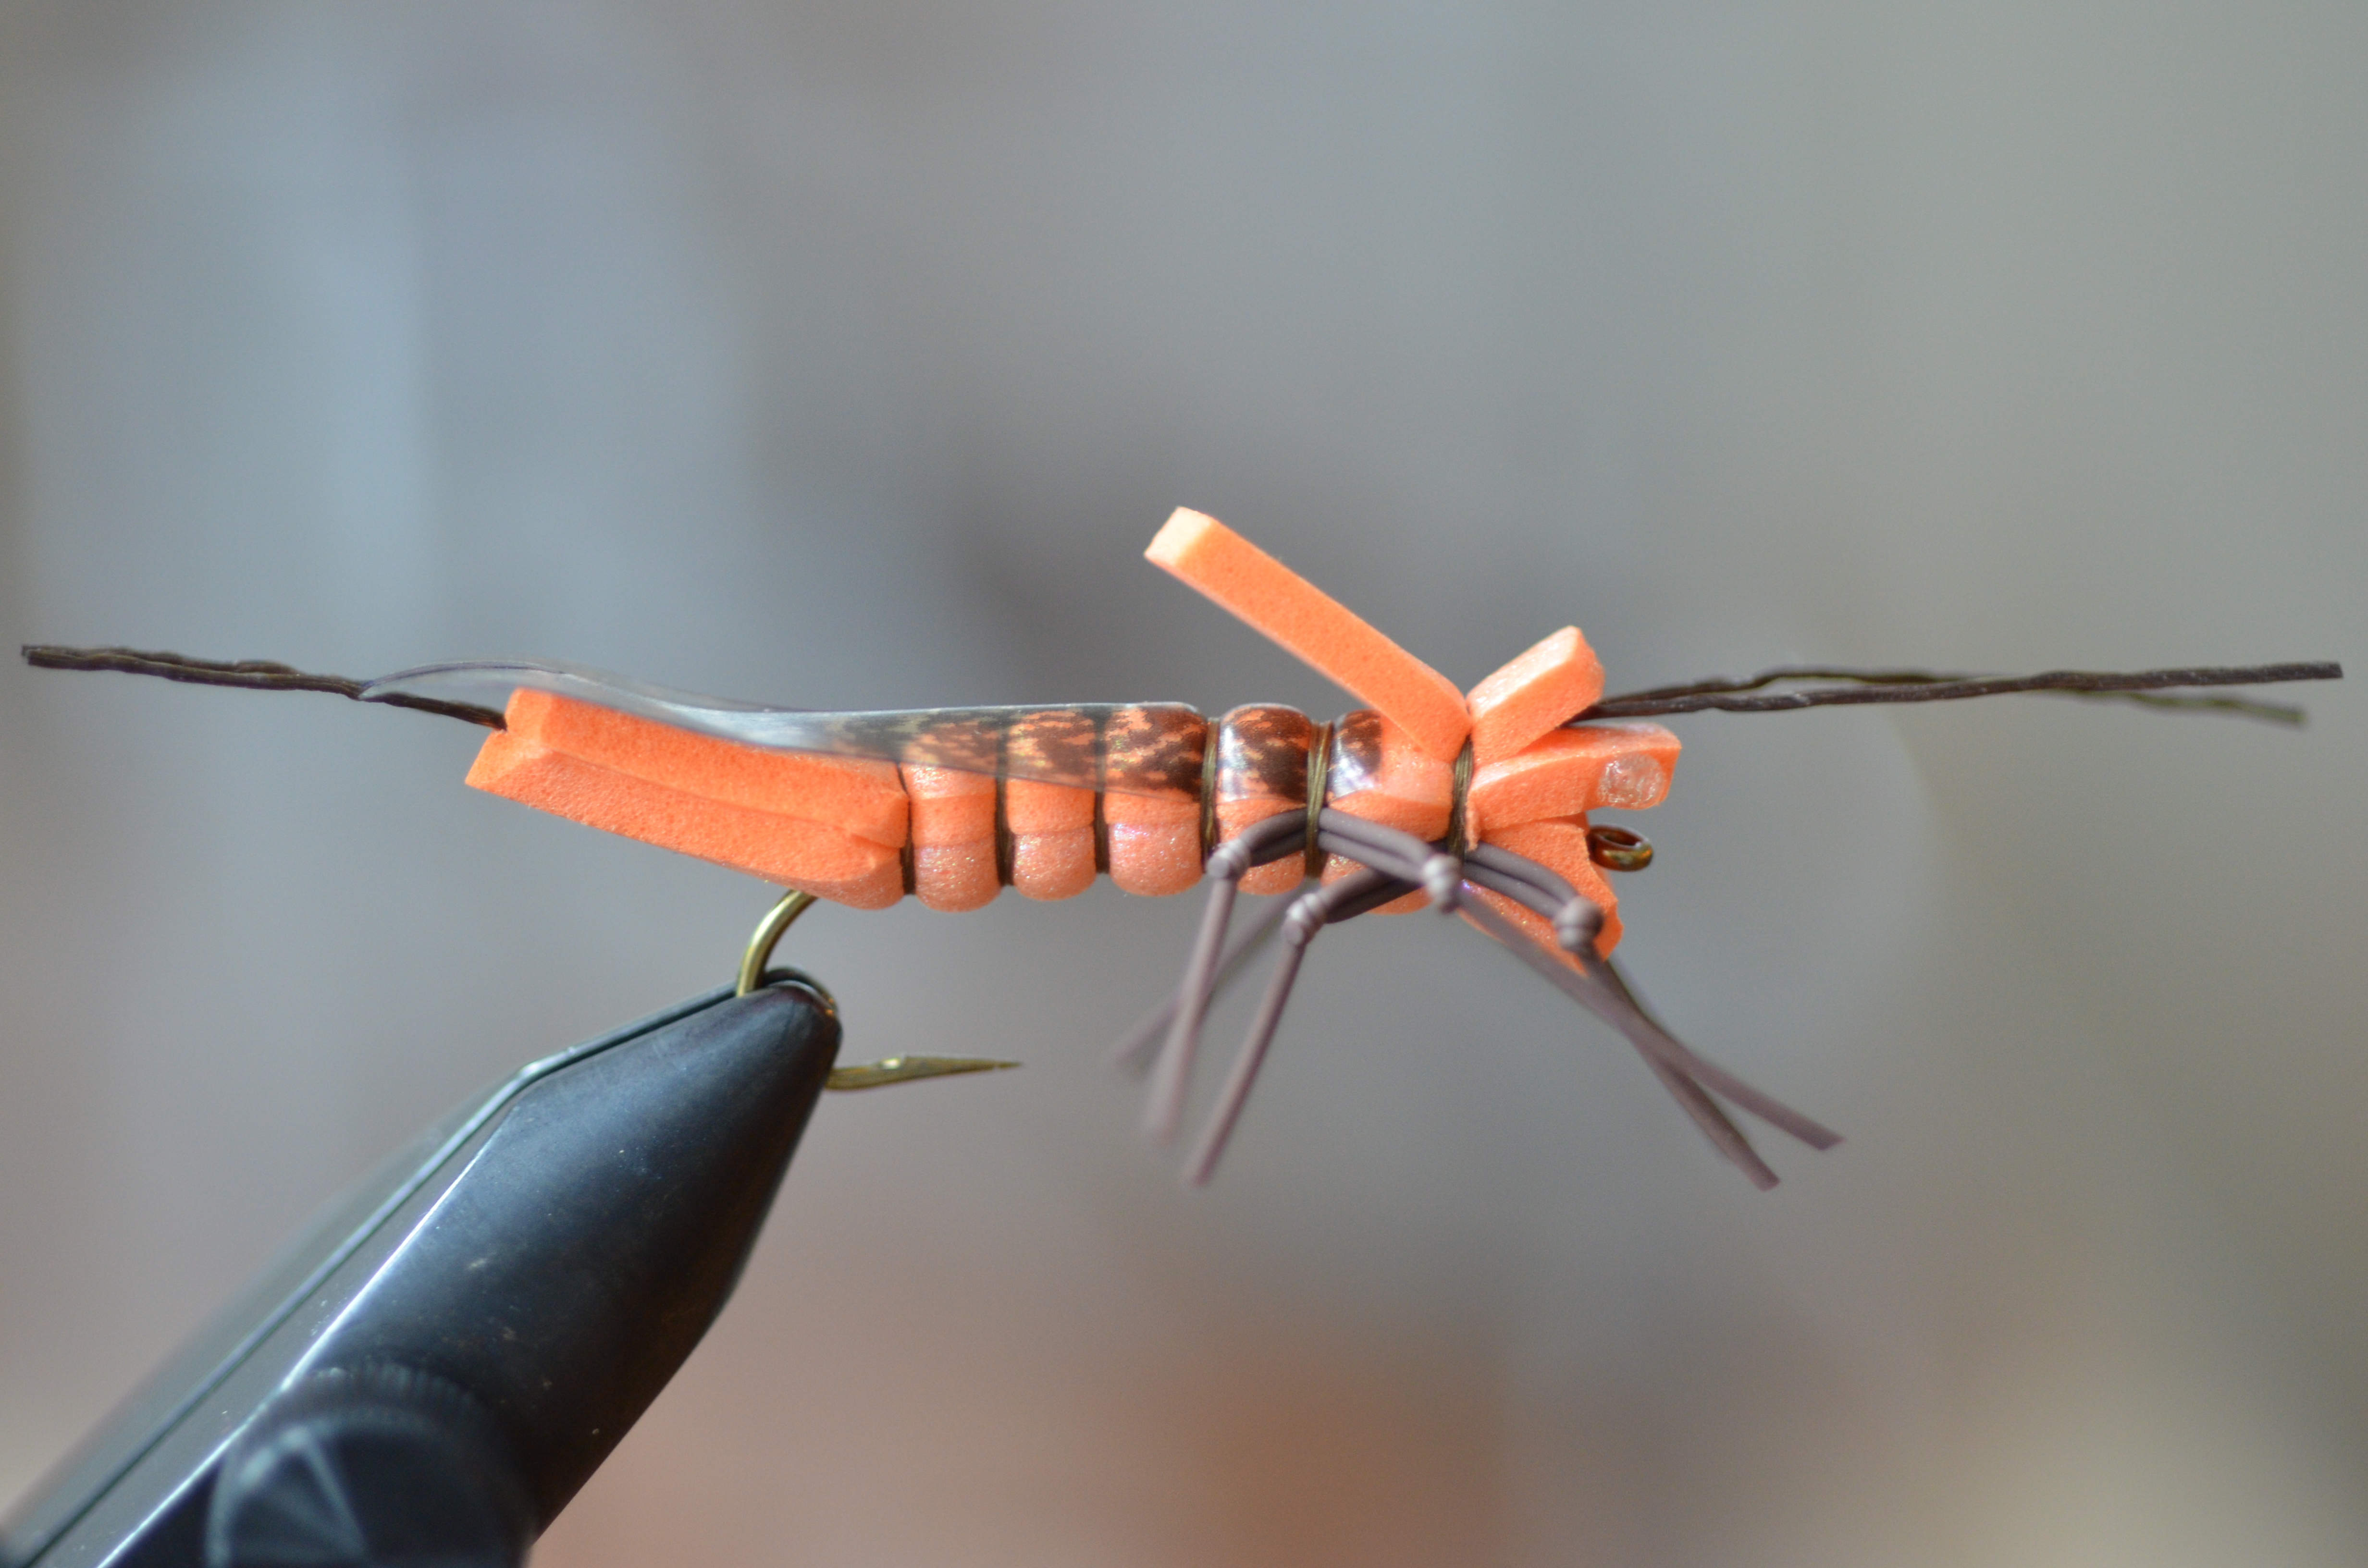
Tying Steps for the Beefcake Stone:
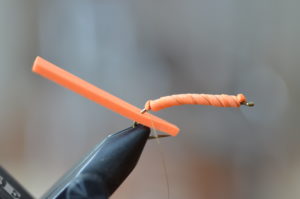
1. Slide the debarbed hook through the bottom piece of foam prior to securing it in the vise. Tie in a 1/8-inch wide foam strip directly behind the eye. Thinly coat the shank with Zap-A-Gap. Wrap the foam to the bend and tie it off.
2. Tie the Sexi-floss tail strand on the near side of the hook with three forward wraps. Pull the excess along the far side of the hook and secure with three rearward wraps. Secure the bottom piece of foam at this point with four wraps.
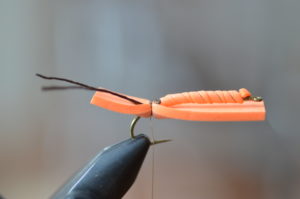
3. Apply a thin layer of Zap-A-Gap on top of the backward-extending portion of the bottom piece of foam. Align the two pieces of foam and briefly squeeze them together. Secure the top piece of foam with four wraps, encircling both pieces of foam.
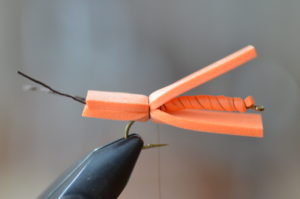
4. Wrap thread forward 1/8 inch. Secure the bottom piece of foam, followed by the top piece, with four wraps each. Repeat until three segments are created. Tie in the wing with four wraps in front of the third segment.
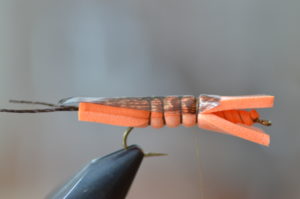
5. Wrap thread forward 1/8 inch. Create the next segment and secure the wing material with four wraps. On the sides of this segment tie in the rear legs with three wraps per pair of legs.
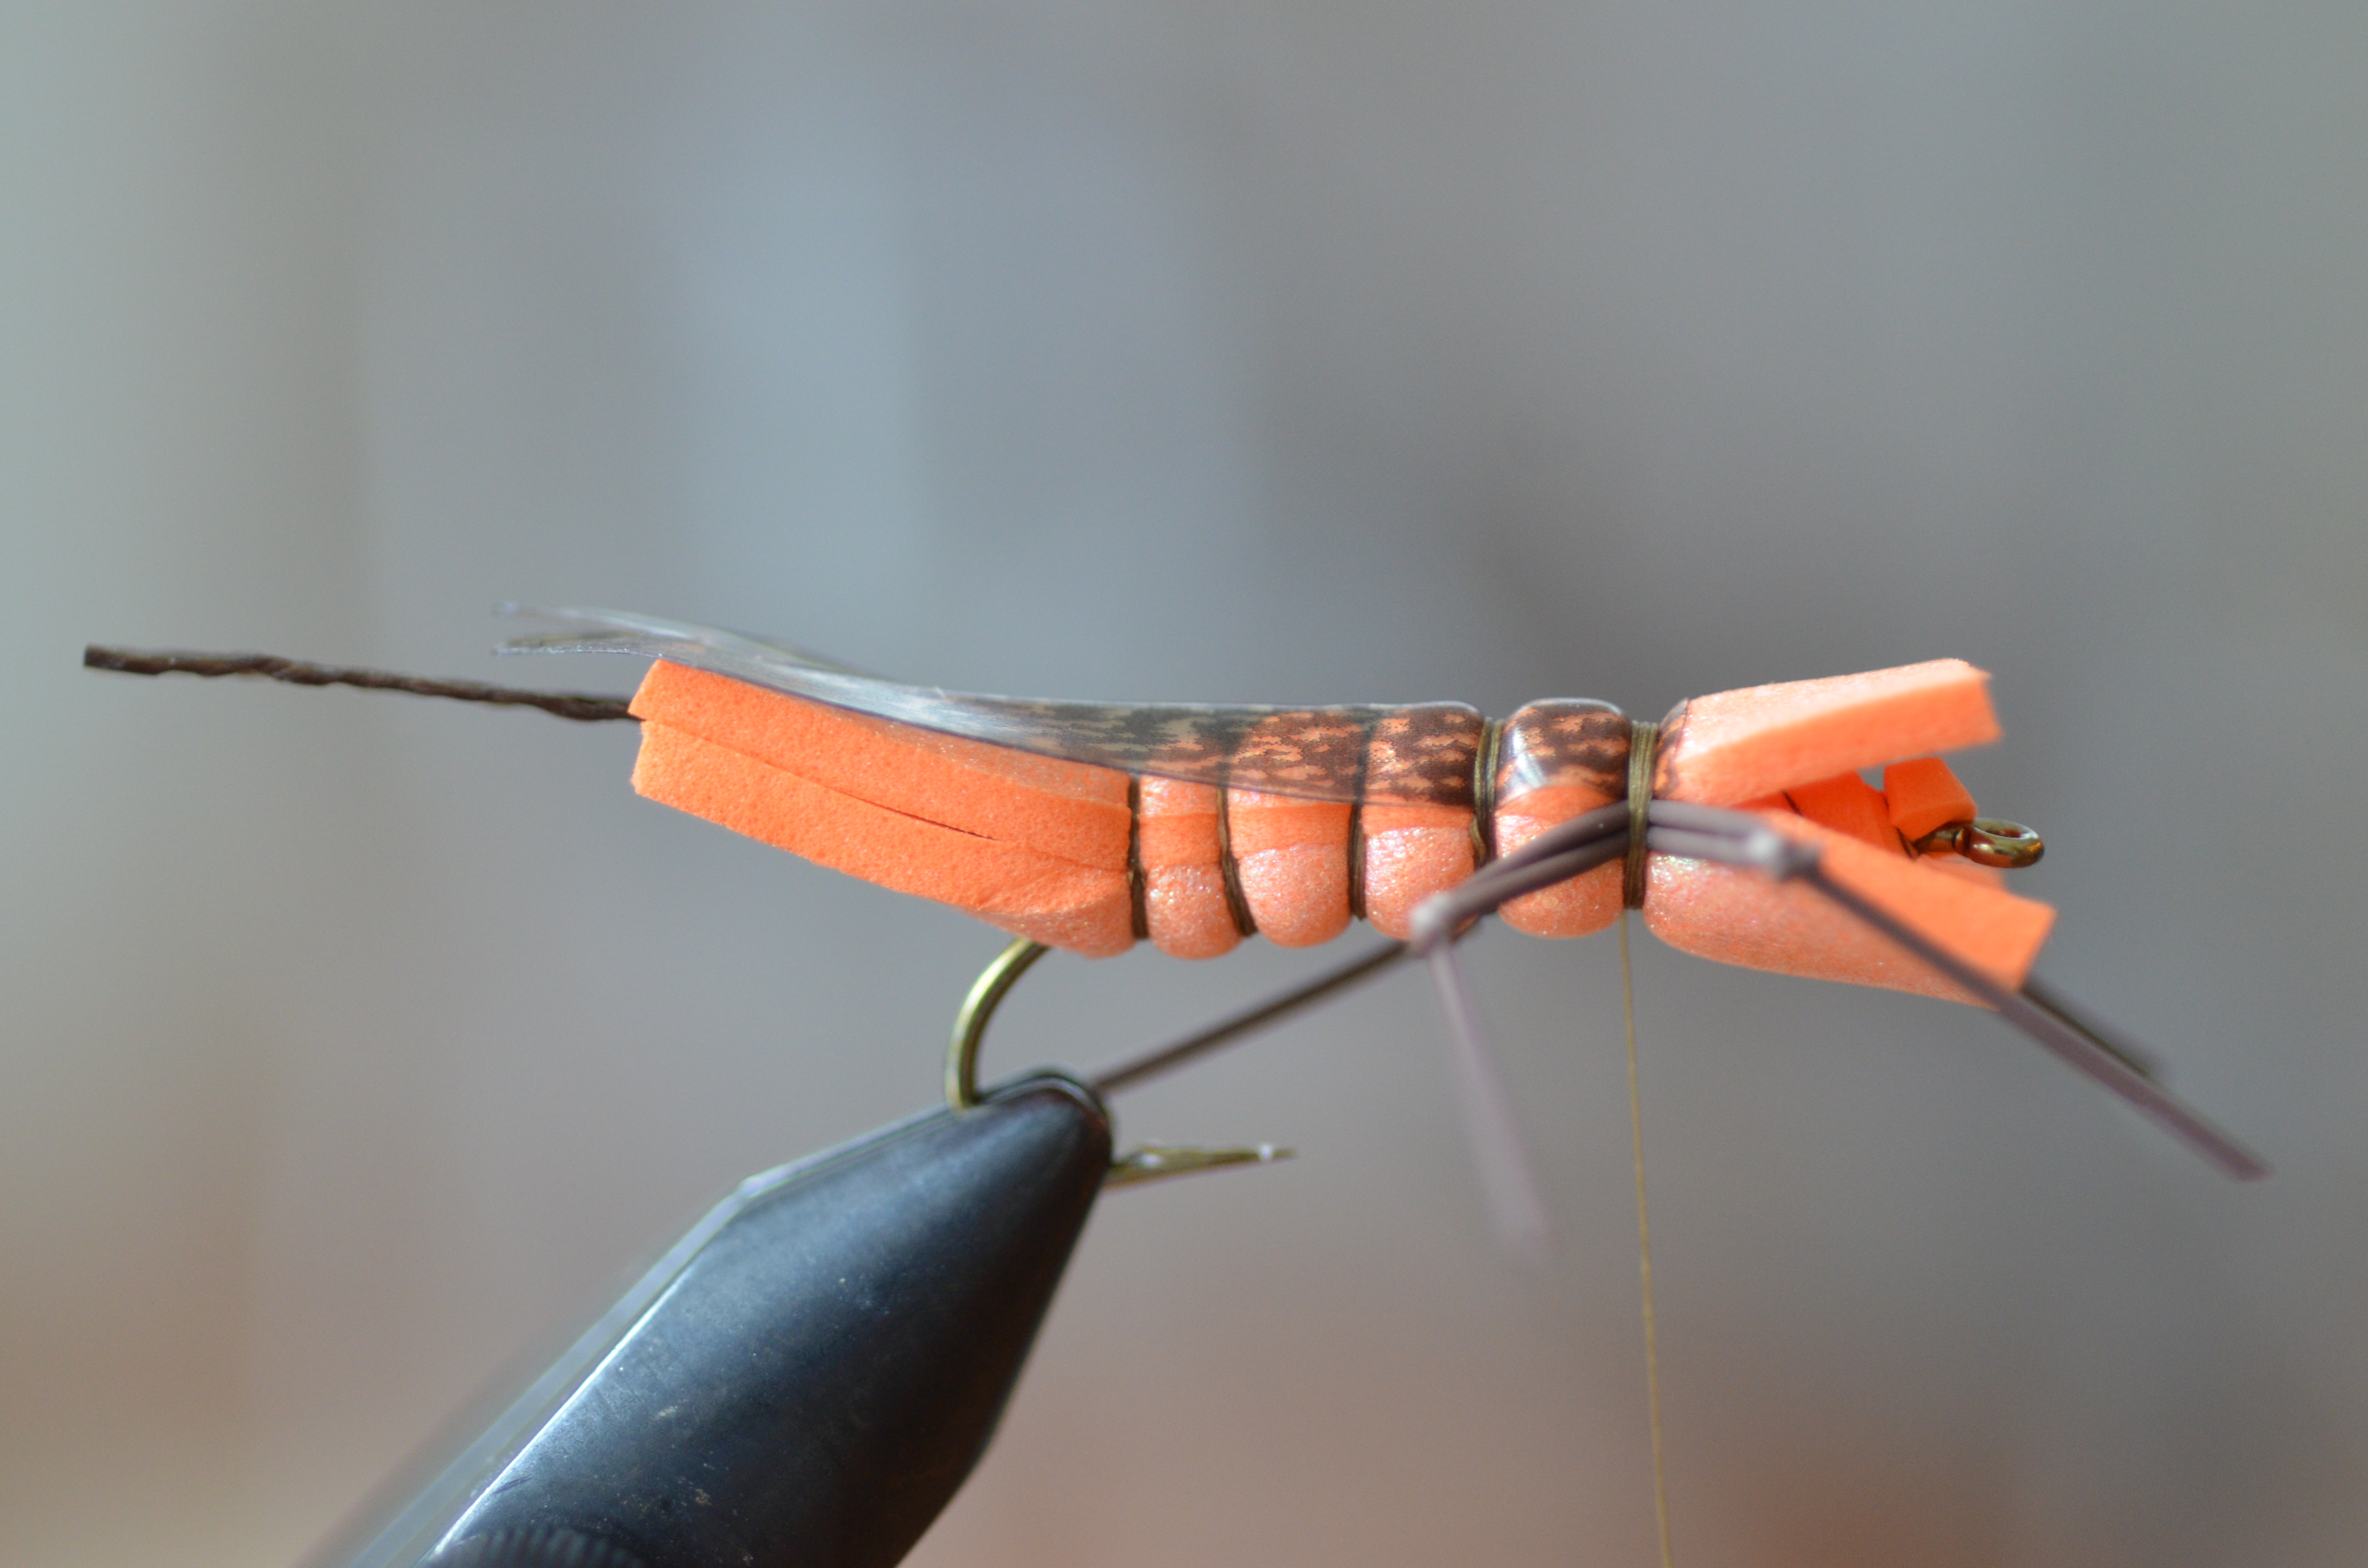
6. Wrap the thread forward and create the next segment. On top of this segment tie in the Sexi-floss antennae, followed by the indicator foam. On the sides of this segment tie in the front legs. Whip finish or half hitch and clip the thread.
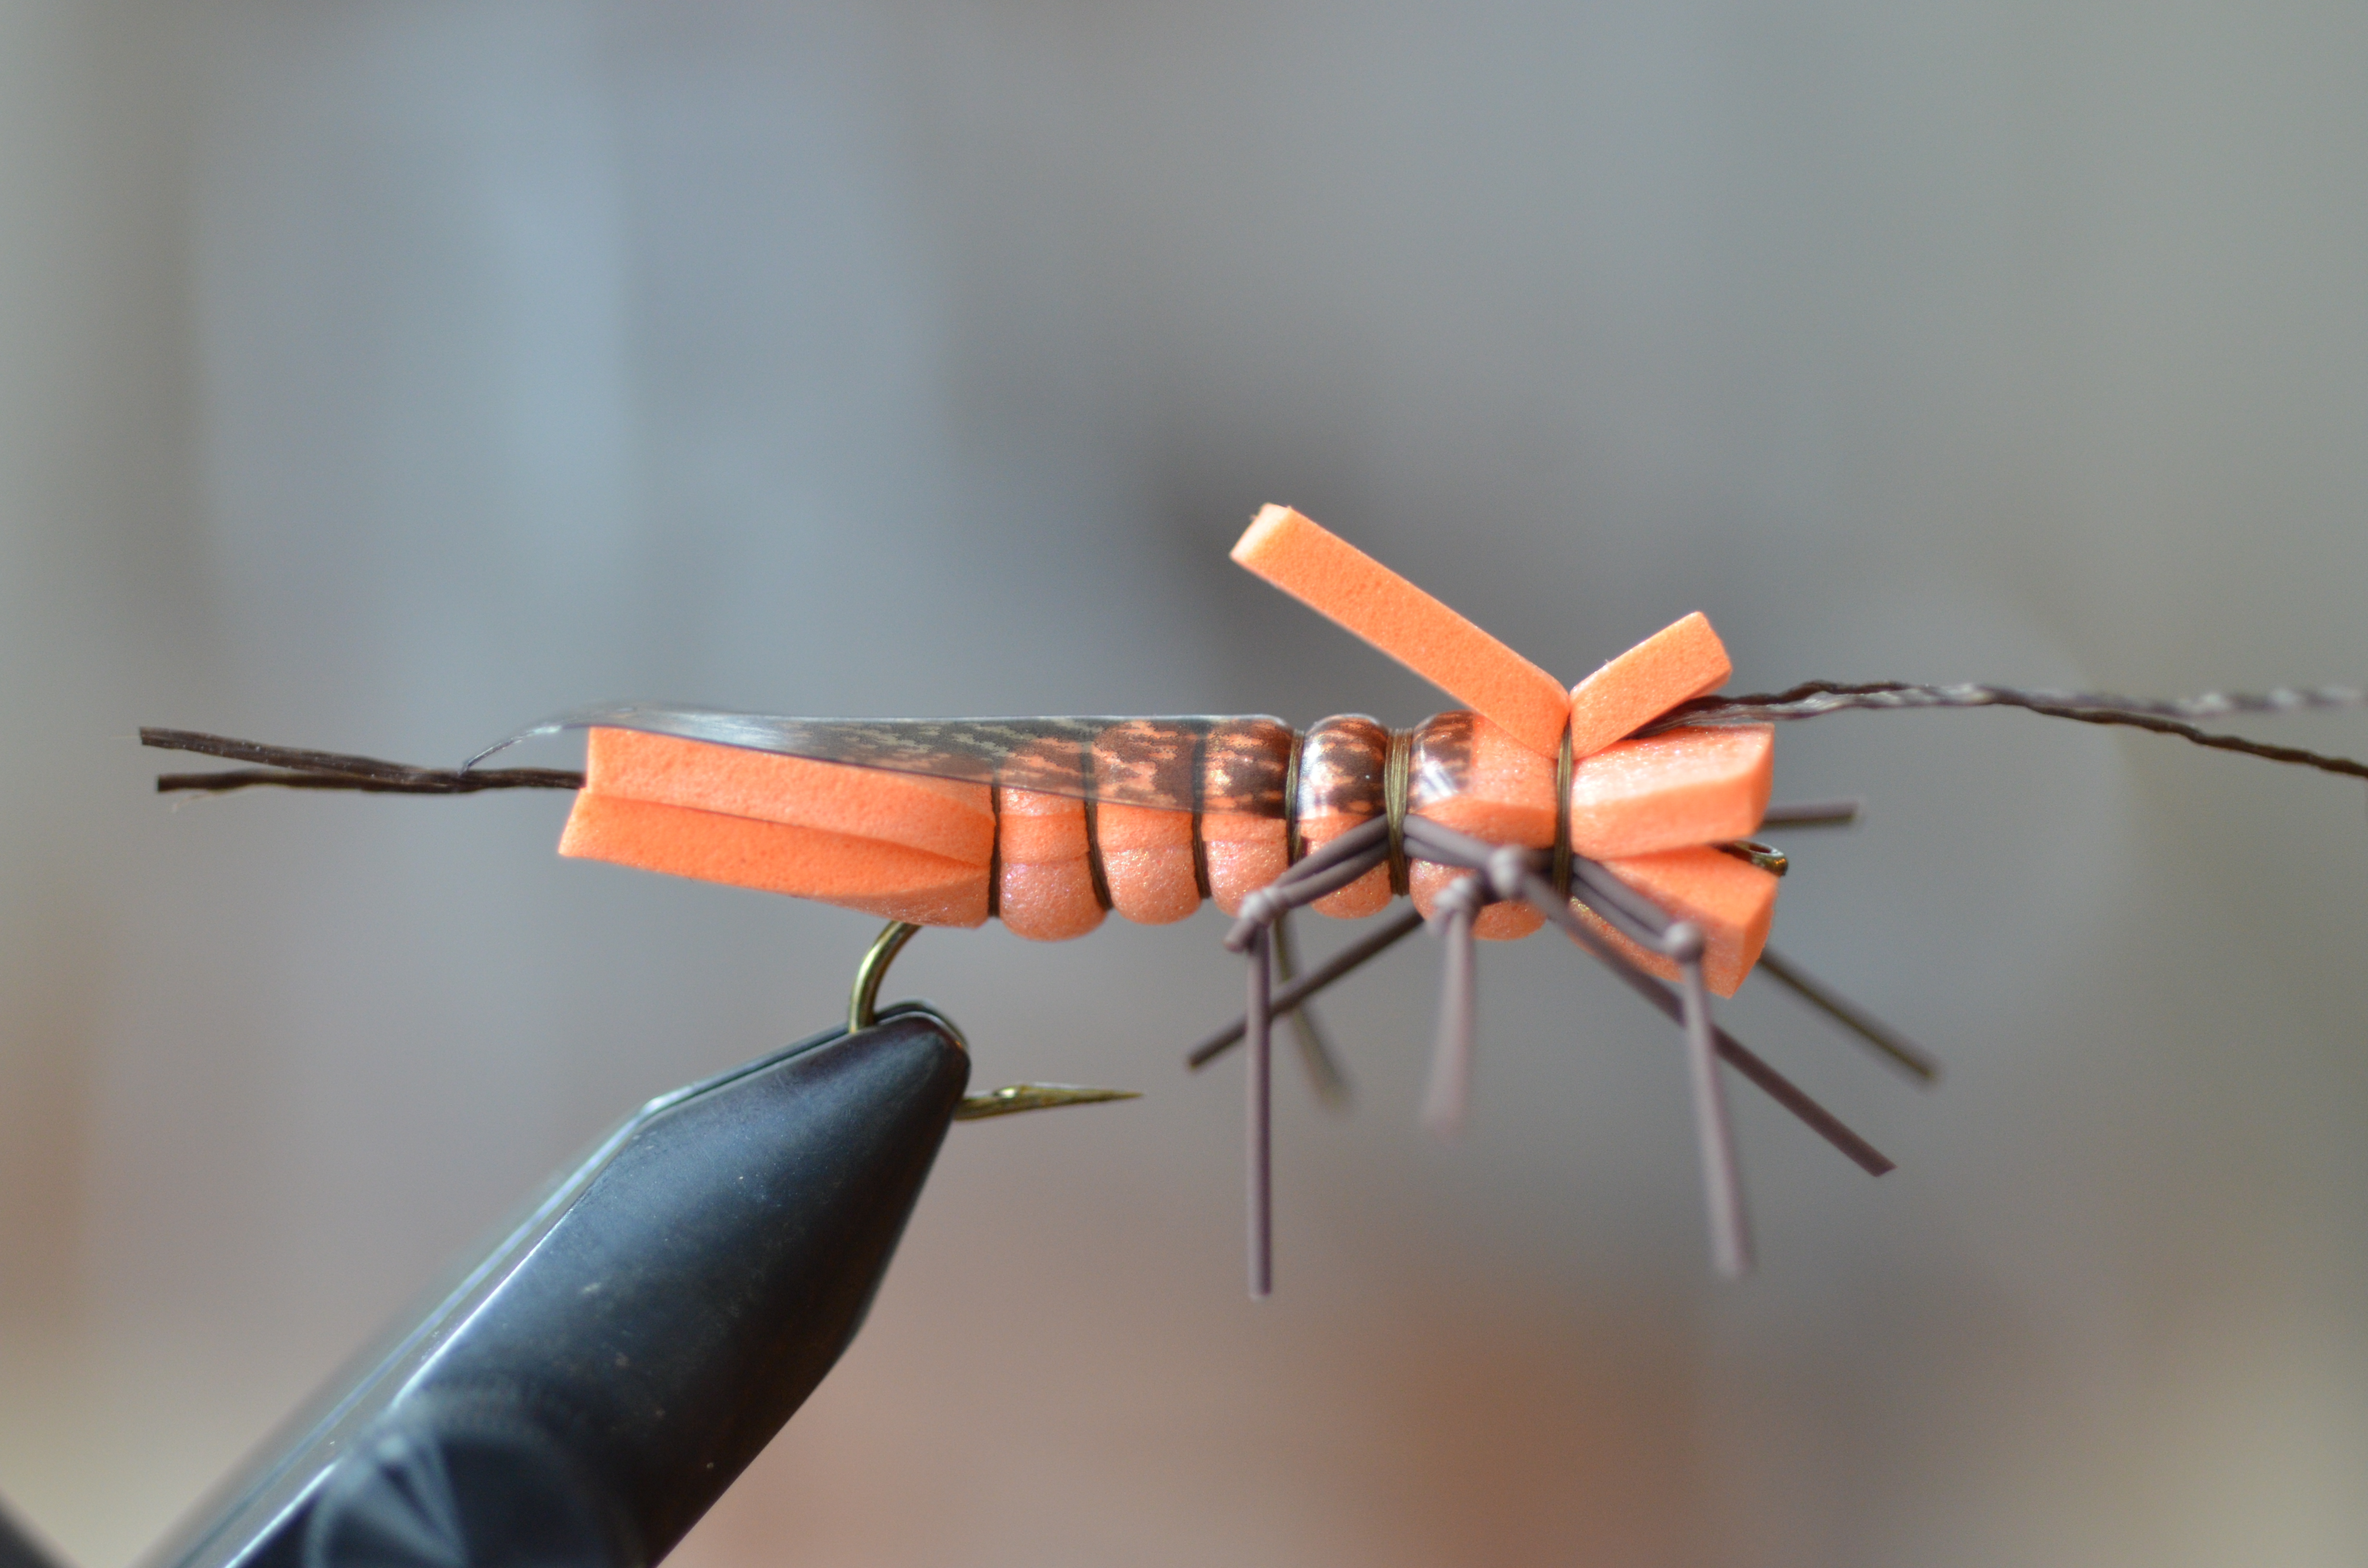
7. Taper both ends of the fly with scissors. Place a large drop of UV Clear Cure Thick on the near and far side of the head to create eyes. Illuminate with UV light for 15 seconds. Colour each eye with a black Sharpie Extreme marker.
8. Rotate the fly in the vise. Brush on a thin coat of UV Clear Cure over the entire underside of the fly and onto the tie in points for all of the legs. Illuminate the entire surface with UV light for thirty seconds.