

Mallard Wings: How to Choose Them, Shape Them, and Mount Them
Will Bush
Tying with feathers is mechanical form of art. You take parts (feathers), that already have a certain shape and texture, combine them in a sequence to create something else entirely – something beautiful, something functional. To me tying is akin to building an engine. In order for that engine to work properly the parts must be used correctly and every step completed with the next step in mind. Feathers can only be manipulated one or two ways to create the intended result. You cannot force a feather to do something against its “will.” In order to have your flies look and swim properly you must first learn how and why these parts work.
In life and fly tying we all think differently and approach things in different ways. Sometimes the simplest ways of doing things are best, yet they often get overlooked. I often learn more from watching my students’ approaches in classic tying than I do from teaching it. While it’s true the feathers have rules as to how and why they work, the skills you employ to achieve the intended result can vary greatly. In this article we are going to focus on mallard wings; how to choose them, shape them, and mount them on a fly so the fly functions properly in the water.
Having come at this completely blind with zero instruction in my teen years, I learned most of this the hard way. It wasn’t until late in high school when I met a fellow who was a ghillie on the River Spey in the 1930s that my tying went to another level. With just a few tips the light bulb went on. Whether these methods are similar to what the early Spey tiers Shanks and Cruckshanks employed is uncertain, but many surviving flies from that era appear to have been tied similarly. At any rate, these are the methods that work for me; hopefully they will work for you as well.
Hooks
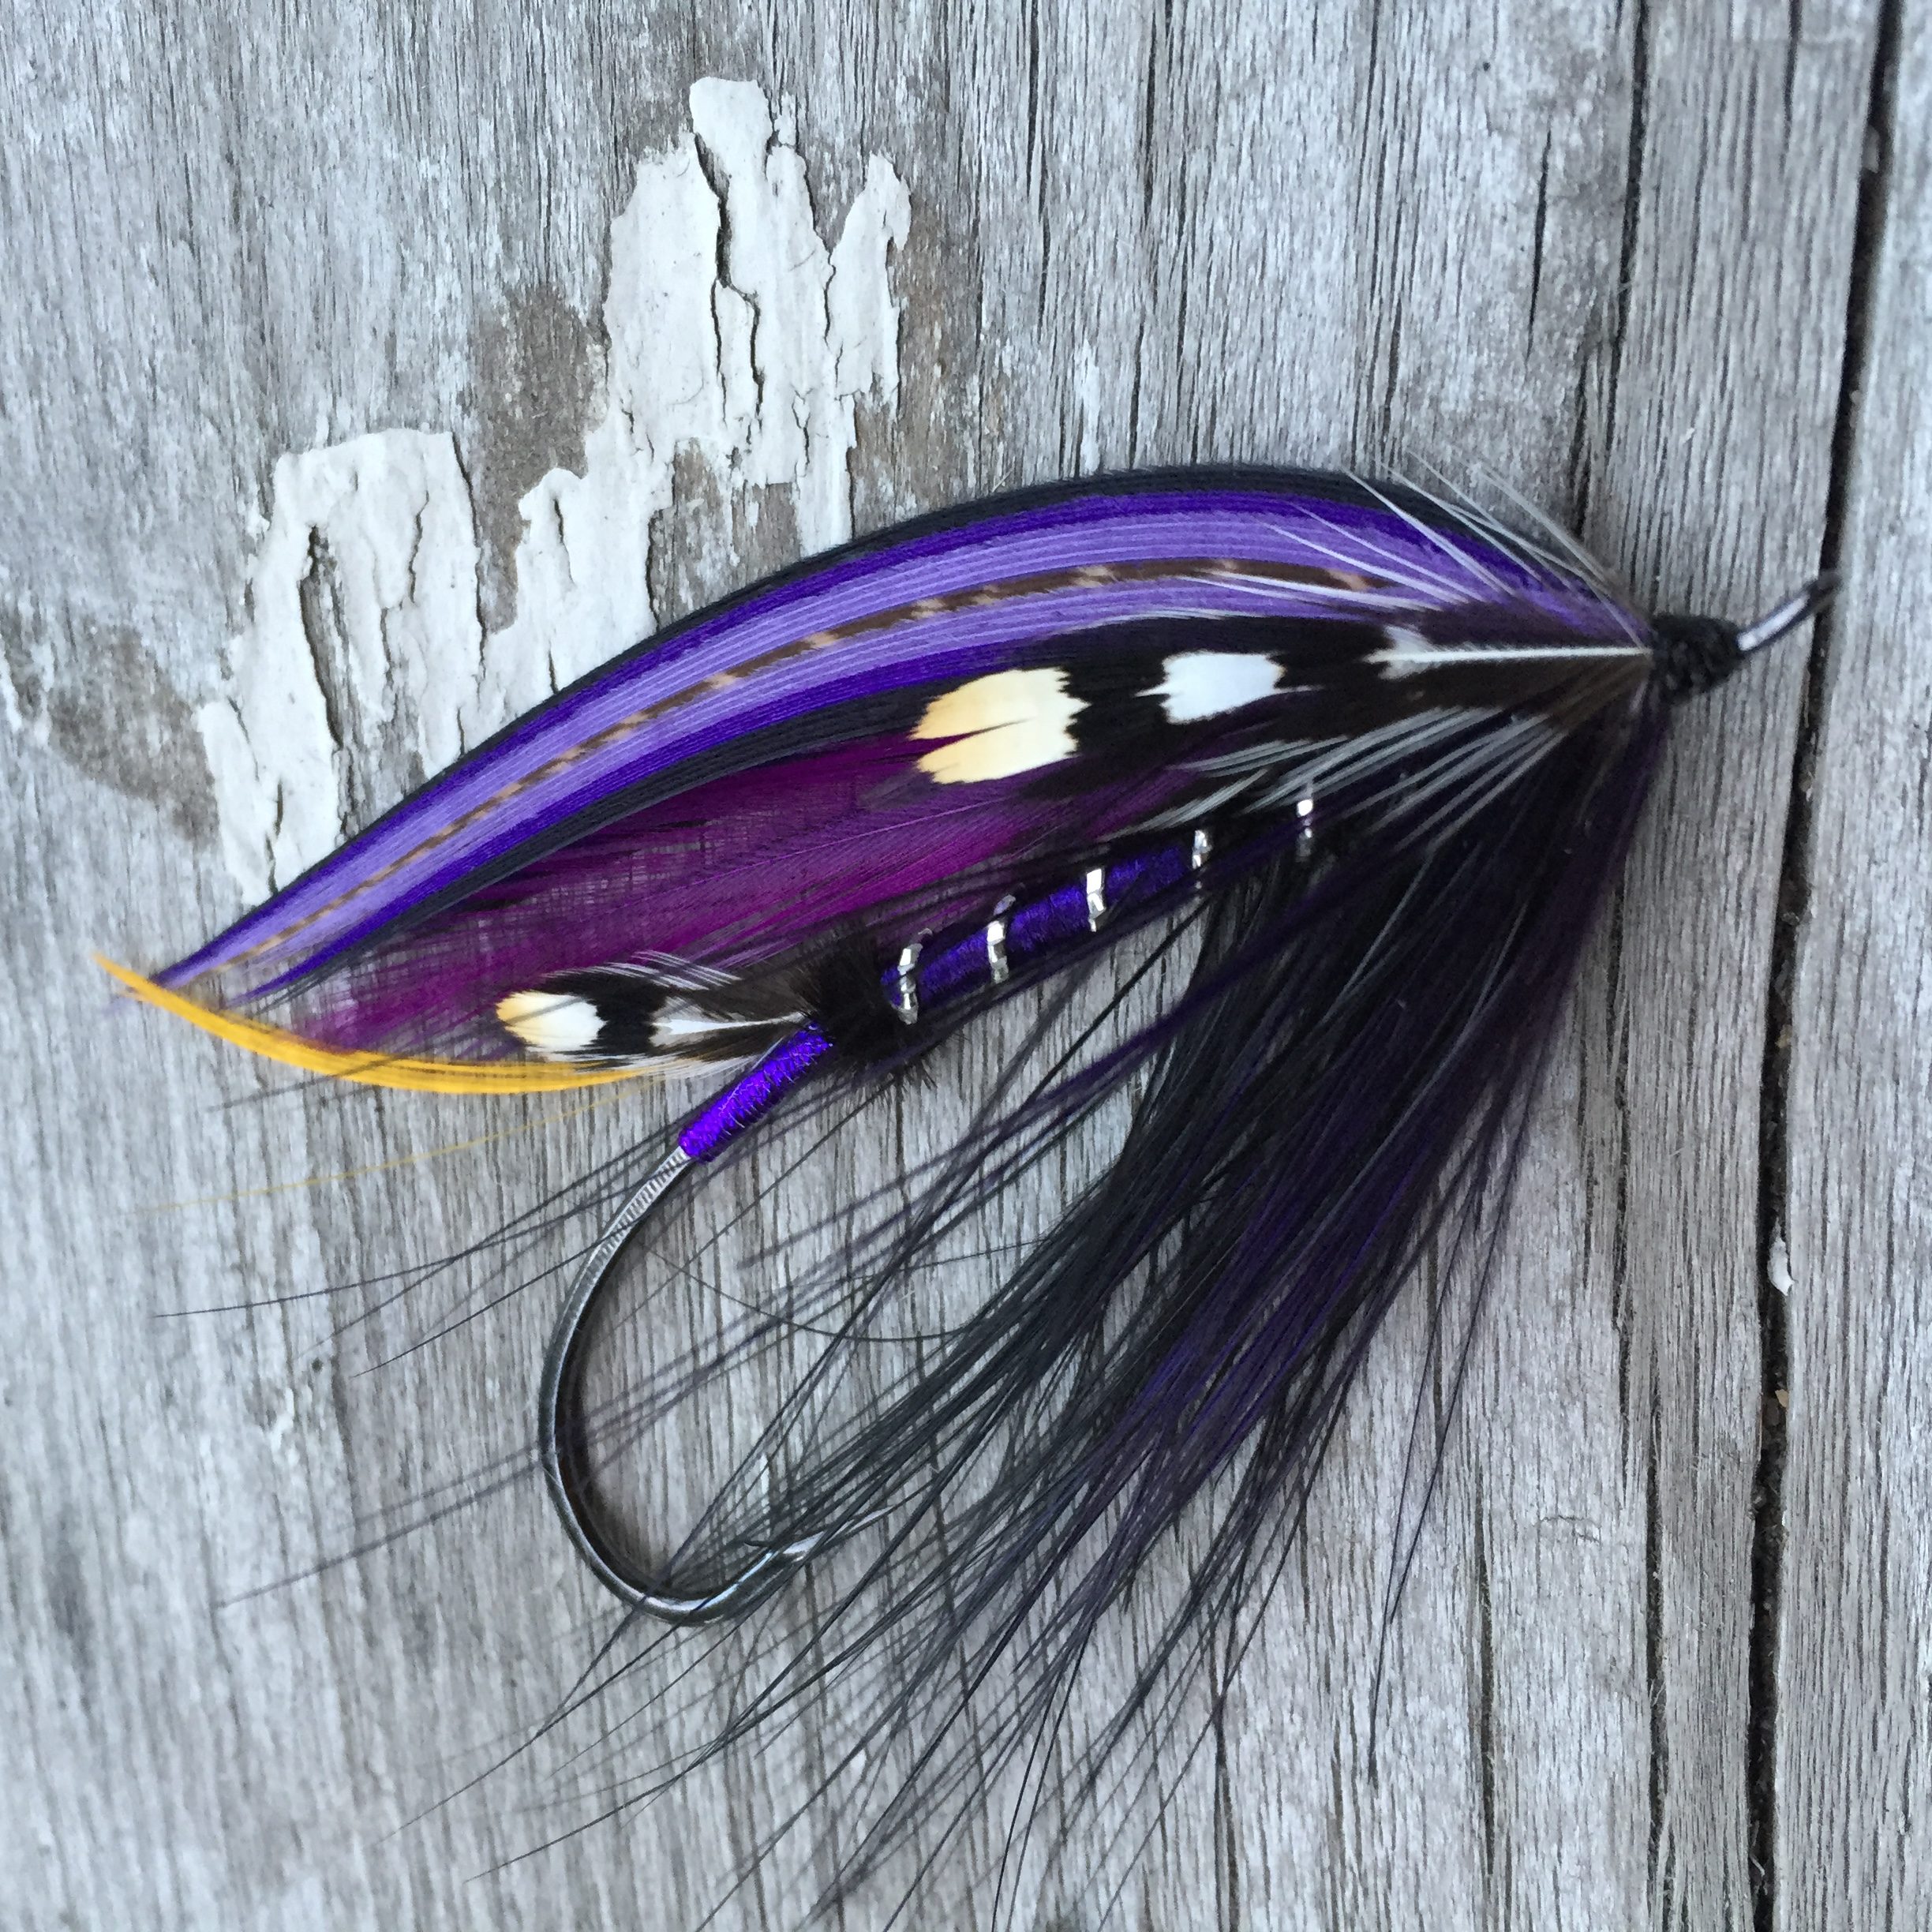
Hooks for Spey flies should have a nice long, continuous bend, with a shank somewhere between 1X and 3X long. Partridge CS10/3 and CS/10/1, Blue Heron, Diiachi 2051, and Tiemco 202SP are my preferred hooks. For this example, we are going to tie a Carron Fly, using a partridge CS10/3 Blind Eye so you can clearly see the wing mounting process.
12 Steps to tying The Caron
Step 1
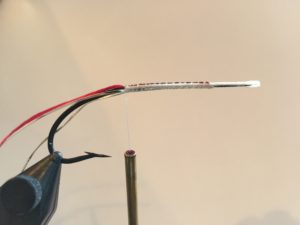
The heavy materials – the tinsels – should always be tied in along the bottom of the hook, starting from just ahead of the hook point, and ending where the throat would start. This not only keeps the weight on the bottom of the fly but keeps the bulk away from the wings. You should always leave more room for the throat and head than you think you’ll need. Extra space can be eaten up spacing out the throat wraps. If you keep the body short and leave a lot of exposed hook shank at the back of the fly, it will act as a keel, helping the fly swim true. Too long and too full a body may cause the fly to swim on its side. In essence, I often tie a size 2 fly on a 1/0 hook.
Step 2
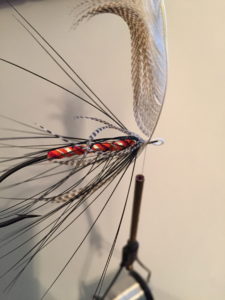
After wrapping all the body materials forward, taking care to leave enough space for the head and throat, tie them off on the underside of the fly. Strip one side of a pintail or teal feather and tie it in by its tip on the underside. Make two or three turns depending on the density of the feather. If we’ve left enough space, the throat wraps should just touch each other. If we’ve left too much, leave a little space between them. It’s critical that the wraps be nice and flat against the hook. Too much bulk created by crowded throat wrapst will push against the underside of the wing, causing it to pop up. Always tie off the throat on the underside of the fly. The little tag end of the clipped feather can create havoc for the wing; you must have a smooth surface under your mallard wings for them to go on easily.
Step 3
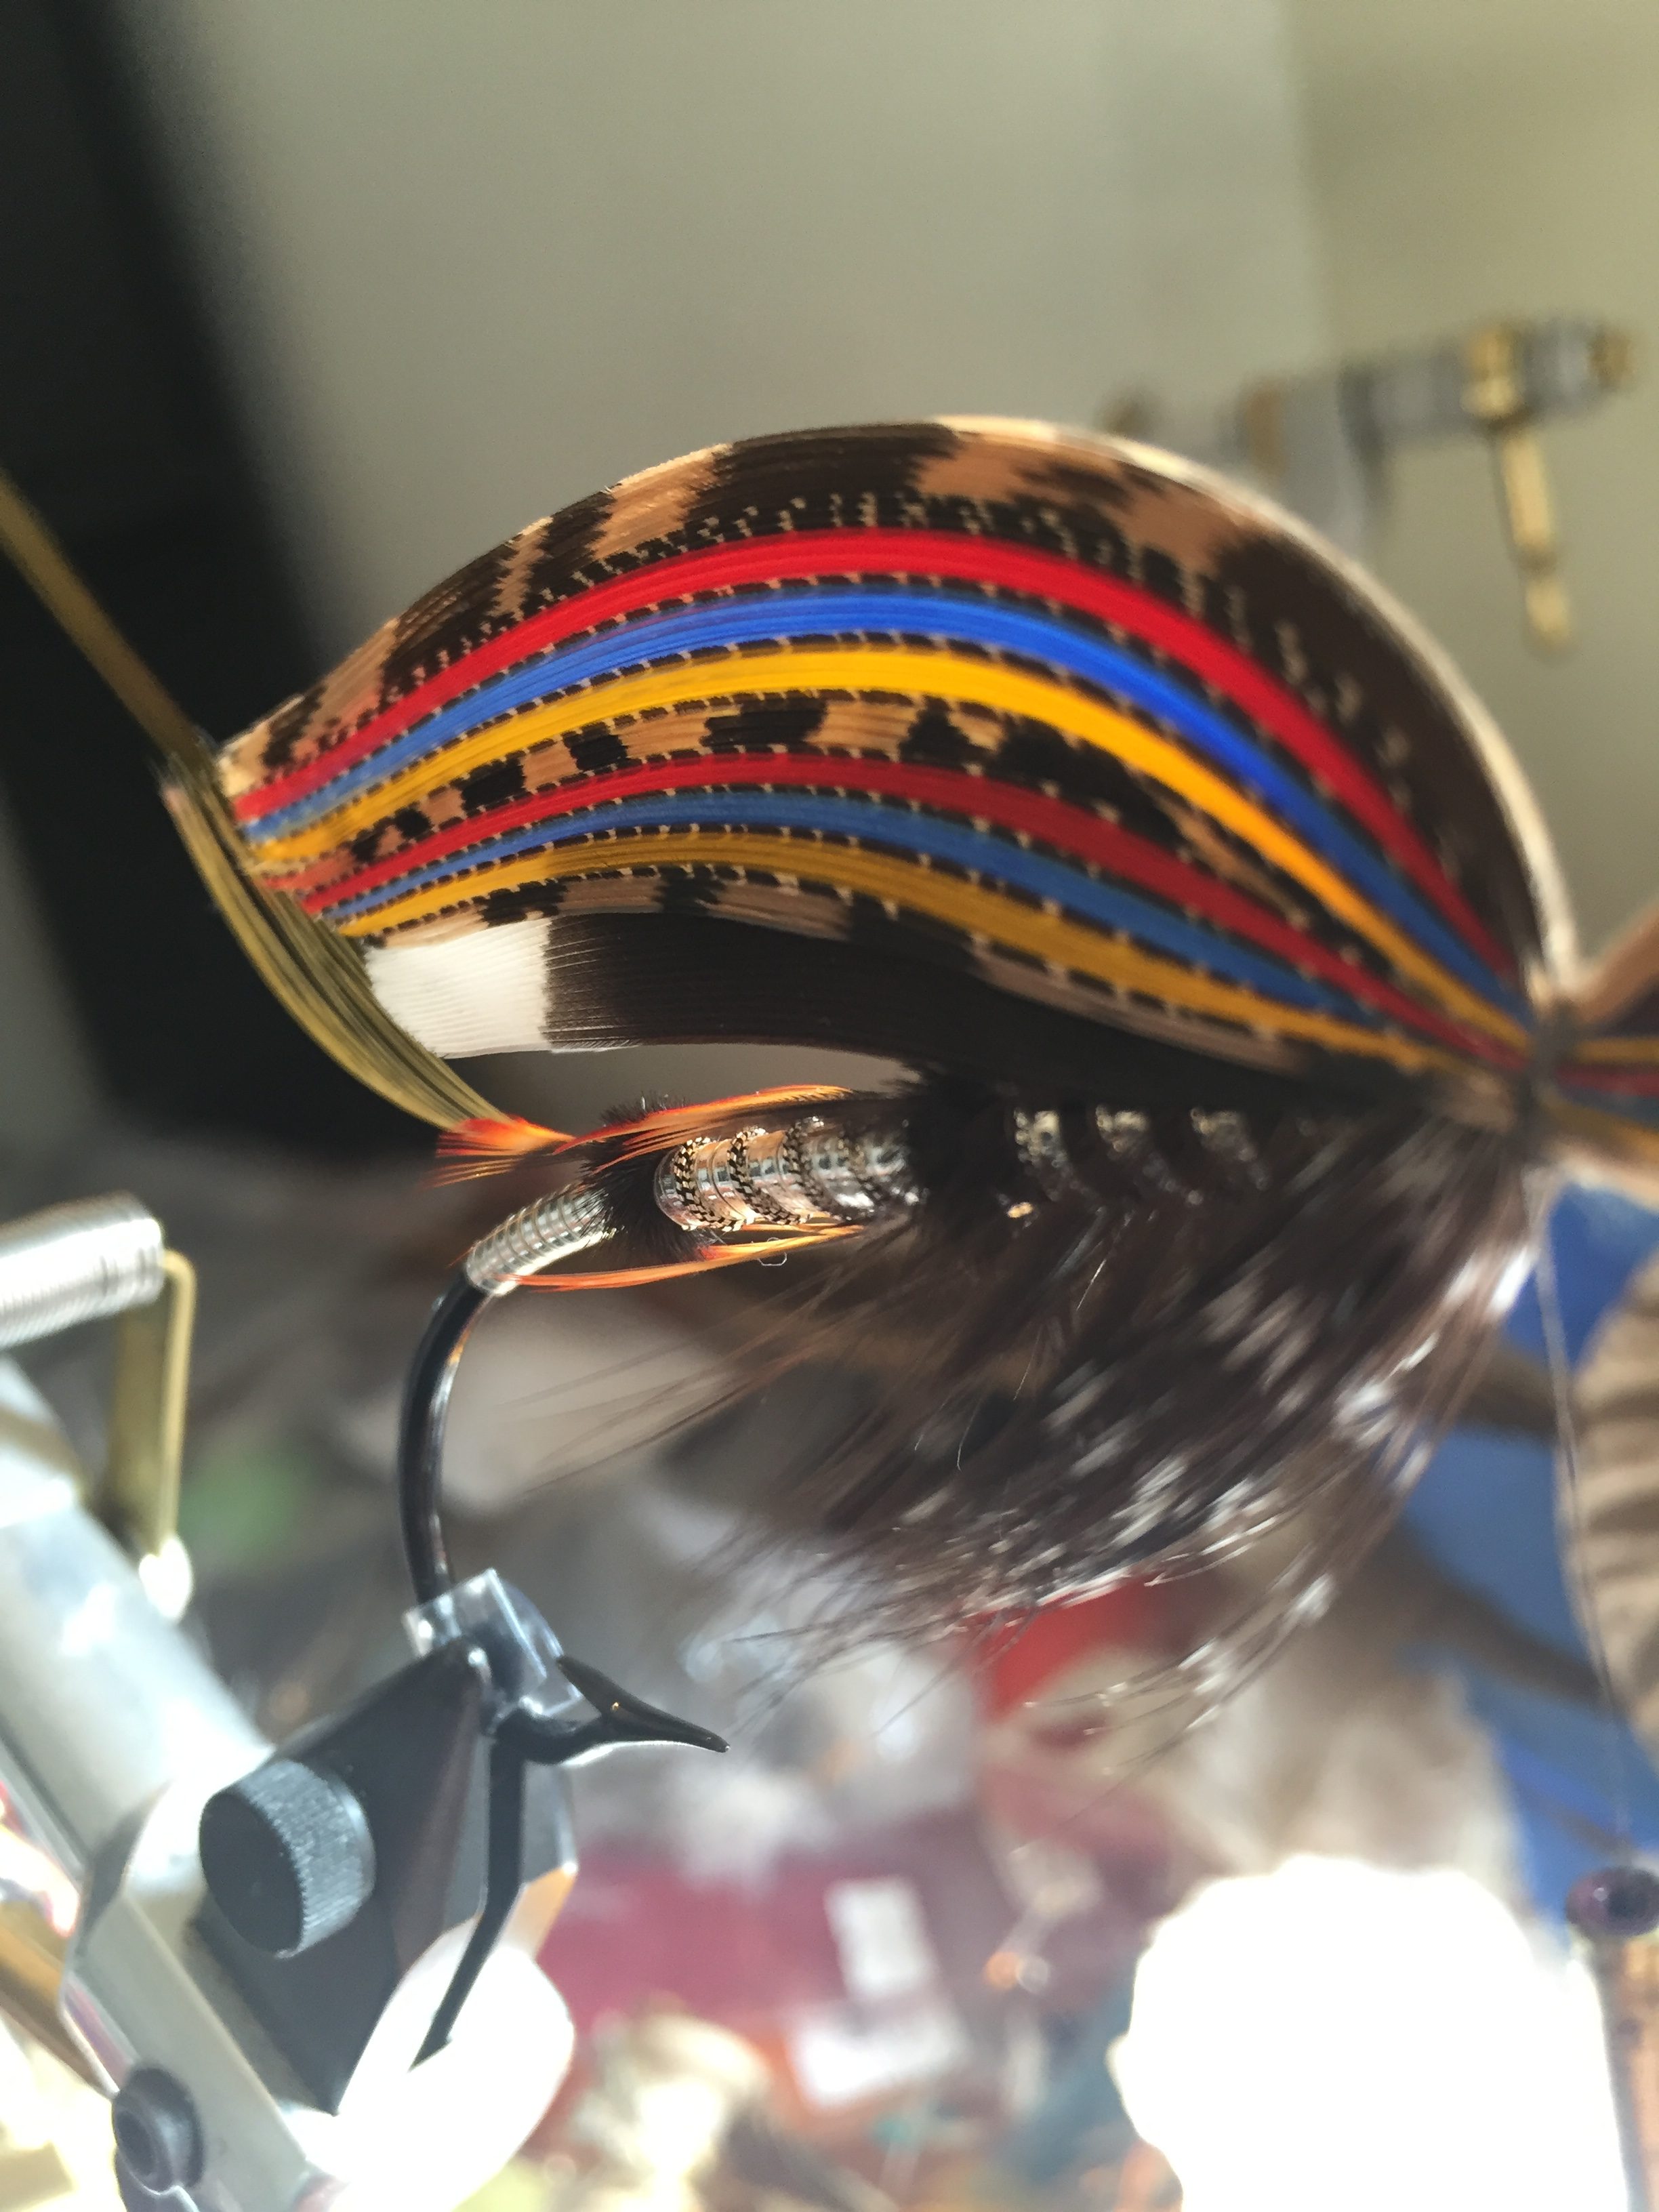
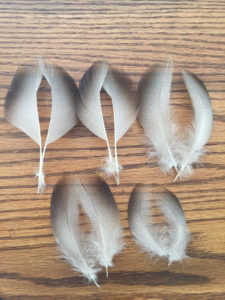
When you select a pair of bronze mallard feathers for your wings, they should be sized to the hook. The closer your tie-in point at the head is to the stem of the feather, the better they seem to cooperate. The tips should extend to or just past the end of the body, never going past the barb on the hook. This may look a little short to you compared to other styles, but this aids in helping the fly swim. The feathers in the photo are from a size 4/0 down to a size 2.
Step 4
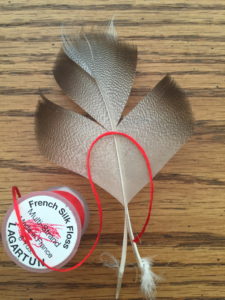
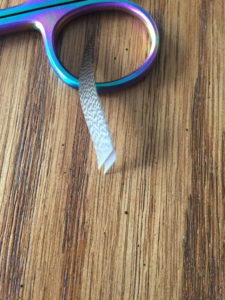
Once you’ve selected a pair, prepare them by stripping the entire backside off the feather and strip off the whole section below the sweet spot. The sweet spot starts where the feather stops sloping towards the base of the stem and starts angling towards the tip. At the top, heading towards the tip, the sweet spot ends where the feather begins to lose its natural curve and upsweep and the pale grey area close to the stem begins to disappear. As you can see in the photo this only gives us enough to tie perhaps two flies out of a larger pair, and only one out of a smaller pair. The area highlighted by the red silk, the pale grey part of the feather without any mottling, is the easiest place to tie the slips onto the fly. Once you get too far away from the highlighted area the wings won’t cooperate as easily. The closer you tie to the stem of the feather the easier it will be.
Step 5
Anytime you work with waterfowl feathers for wings on Speys or shoulders on full-dress patterns – whether mallard, teal, or any other species – your life is a lot easier when you leave the barbules you’re working with on the rachis (stem). Starting from the bottom, choose a section twice the size you think you will need from each side, about 2 1/2 cm long. Separate the barbules to make sure they’re the same size, then clip these sections out of the stem.
Step 6
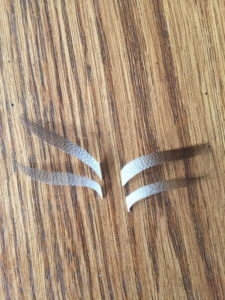
After you’ve clipped out the sections, take those and clip them almost in half. You want one section slightly smaller than the other.
Step 7
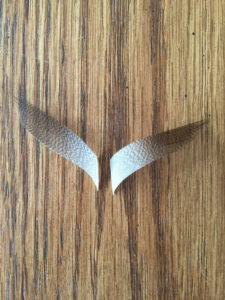
Now take the thicker section and lay it on top of the smaller one. Make sure the stem of the smaller one sticks out further than the larger. Make sure that the top edges of the slips line up as they do in the photo.
Step 8
We are now going to add a bit of shape to the wings. Although this isn’t crucial to having them maintain their shape once on the fly, it aids in tying them on. Firmly grab the slips as one by the butts with your right hand. Take your left hand and apply a little pressure between your fingers as you stroke the fibres down and away from your right hand. Once you take your left hand away the slips should remain curved in the opposite direction to what they were before. Repeat with the opposite side.

Step 9
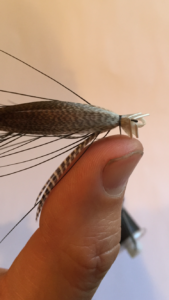
Once you have shaped the wings, transfer them to your left hand. Hold them just in front of the stems so you can see your tie-in point. Place them onto the fly, pressing them against the body with just the pointer finger of your left hand. Then move your thumb to the underside of the body, just as a brace. Make sure the two slips are still aligned and take two or three light wraps. If the wing appears as in the photo, snug up the wraps by smoothly pulling down on the bobbin. There is no need to add any more wraps, as the wings must be able to move a little in the next steps.

Step 10
Attach the opposing wing the same way you did the first one, by holding the wing against the body of the fly with your pointer finger and bracing it underneath with your thumb. Make sure the the wings are exactly side by side, right up against each other, and not overlapping. Before you tie them down make sure the tips of the wings line up with each other at the back. The butts need not be even as they are in the photo.

Step 11
Now that the wings are in place it’s time to adjust them. If they do not line up over the back, are crossing over one another, or have slipped down the side of the head, you can move them by pushing or pulling on the stems. This takes a little practice to see exactly how they move, but if you hold the tip of the wing with your left hand and push up on the bottom of the stem and towards the eye with your right as in the photo, it causes the tips of the wings to move away from the other side and move the inside edge of the wing together. No matter which way you need to adjust the wing to seat it properly, you can always use the stems to move it around. If tied in correctly, with the inside edge of the wing touching from the head to the tips, the natural opposing curve of each wing will force it to stay together and down against the body. Once you are happy with it, carefully take your scissors and trim the butts, being sure not to move the stems as you cut.
Step 12
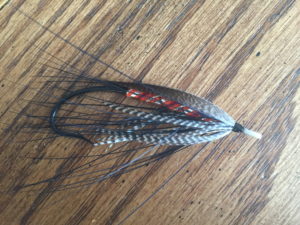
The completed fly should have the wing following the contour of the hook all the way along, with the tips touching or just slightly above the back of the body.
Article by Will Bush
As Published in Volume 14, Issue 1 – Fly Fusion Magazine